4.1. Using MoveIt2#
This section explains how to use MoveIt2.
For specifications and details of MoveIt2, refer to the official MoveIt 2 documentation .
4.1.1. Creating a Workspace#
Create a workspace for using MoveIt2. Follow the steps below.
Run the following to install the tools required for building.
$ sudo apt update
$ sudo apt install -y python3-colcon-common-extensions python3-rosdep
$ sudo rosdep init
$ rosdep update
Then run the following to create the workspace, clone the required packages, and build them.
$ source /opt/ros/<ROS_DISTRO>/setup.bash
$ mkdir -p ~/hsr_ros2_ws/src && cd ~/hsr_ros2_ws/src
$ git clone -b $ROS_DISTRO https://github.com/hsr-project/hsrb_moveit.git
$ cd ~/hsr_ros2_ws/
$ rosdep install --from-paths . -y --ignore-src
$ colcon build --symlink-install --cmake-args -DCMAKE_BUILD_TYPE=Release
$ source install/setup.bash
4.1.2. Launching MoveIt2#
Follow the steps below to launch MoveIt2.
Launching HSR
Run the following to set the environment variables. Set
ROS_DOMAIN_IDto an appropriate value.$ export ROS_DOMAIN_ID=XXX $ source /opt/ros/<ROS_DISTRO>/setup.bash
Run the following to launch the simulator.
$ cd ~/hsr_ros2_ws/
$ source install/setup.bash
$ ros2 launch hsrb_gazebo_launch hsrb_empty_world.launch.py rviz:=false
Launching MoveIt2
Run the following to set the environment variables. Set
ROS_DOMAIN_IDto the value specified when launching the simulator.$ export ROS_DOMAIN_ID=XXX $ source /opt/ros/<ROS_DISTRO>/setup.bash
Run the following to launch MoveIt2.
$ cd ~/hsr_ros2_ws/
$ source install/setup.bash
$ ros2 launch hsrb_moveit_config hsrb_demo.launch.py use_sim_time:=true
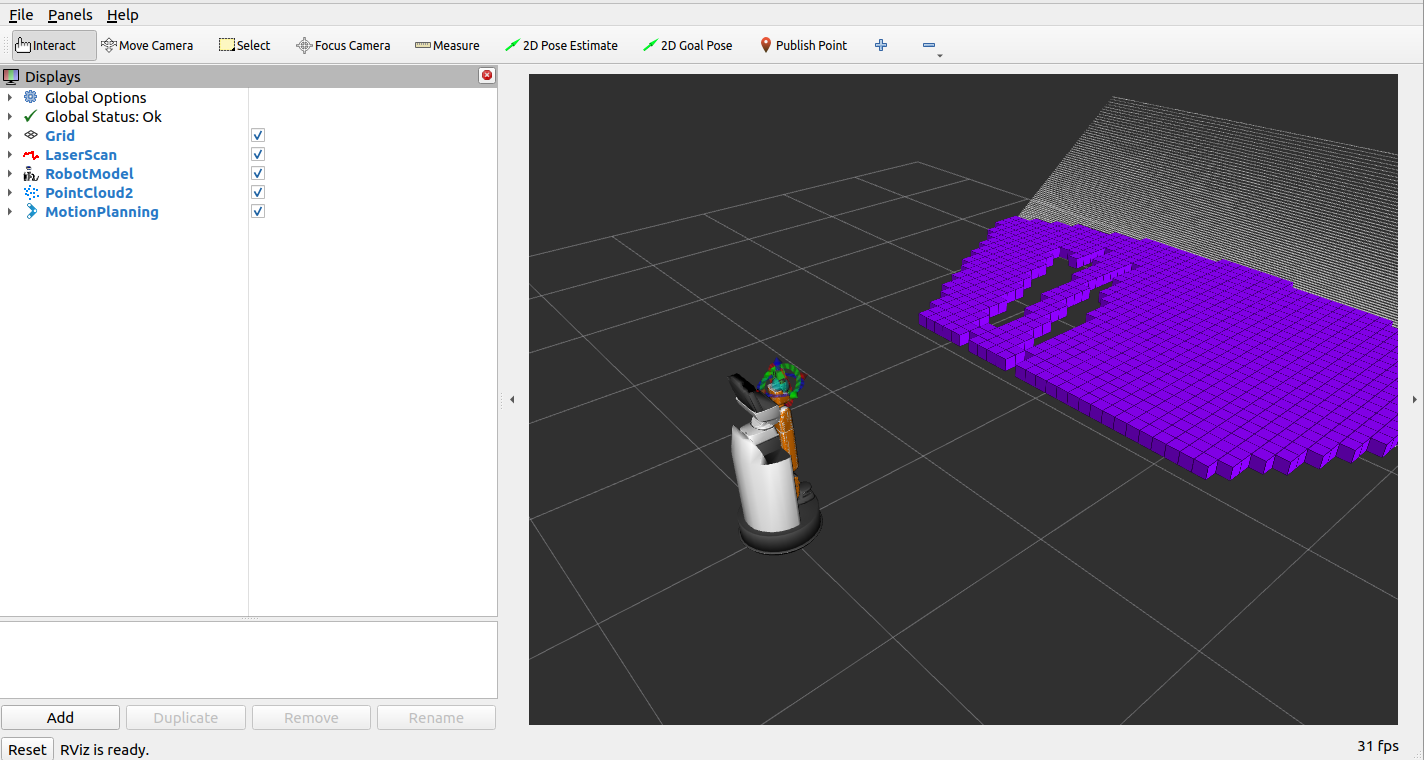
After completing the above steps, an RViz screen similar to the one shown below will appear.
4.1.3. Operation via GUI#
This section explains how to operate HSR using MoveIt2 through the GUI.
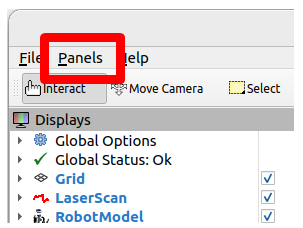
Click “Panels” in the upper-left corner of the screen and check “MotionPlanning”.
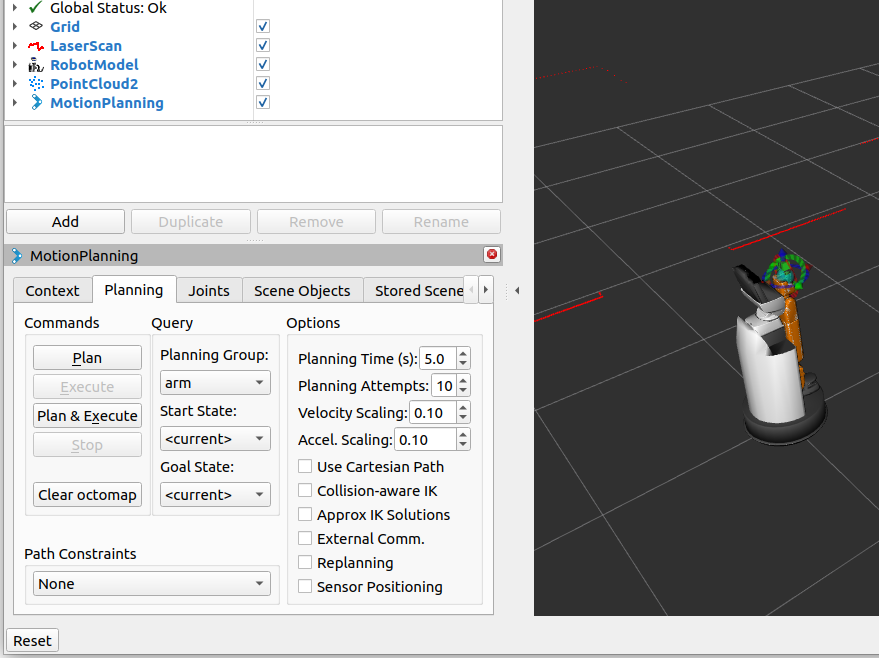
Once checked, the “MotionPlanning” tab will appear as shown in the figure.
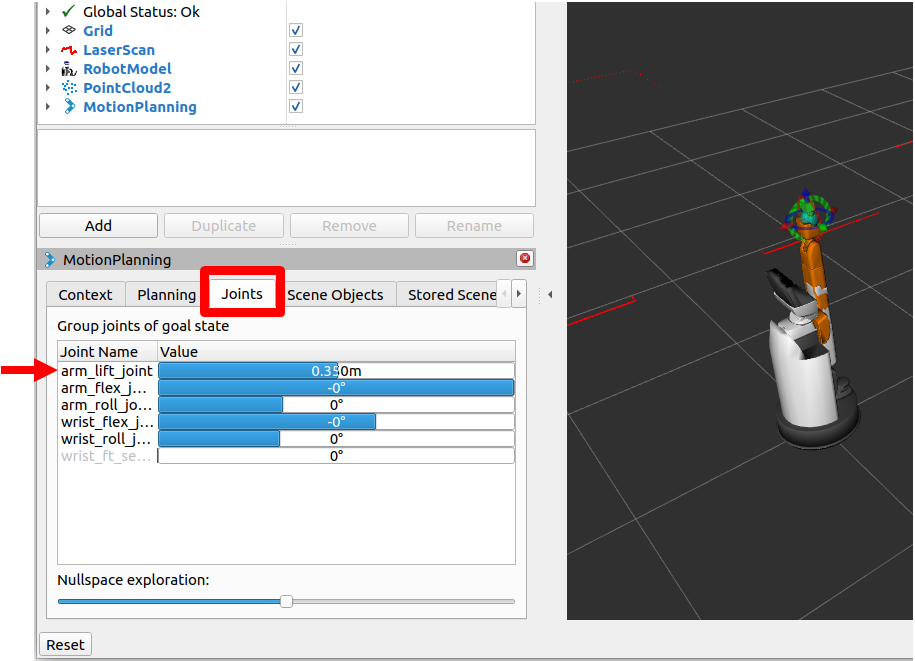
As an example, move the “arm_lift_joint”.
In the “Joints” tab, move the “arm_lift_joint” slider to the right to increase the value. The target pose will be displayed.
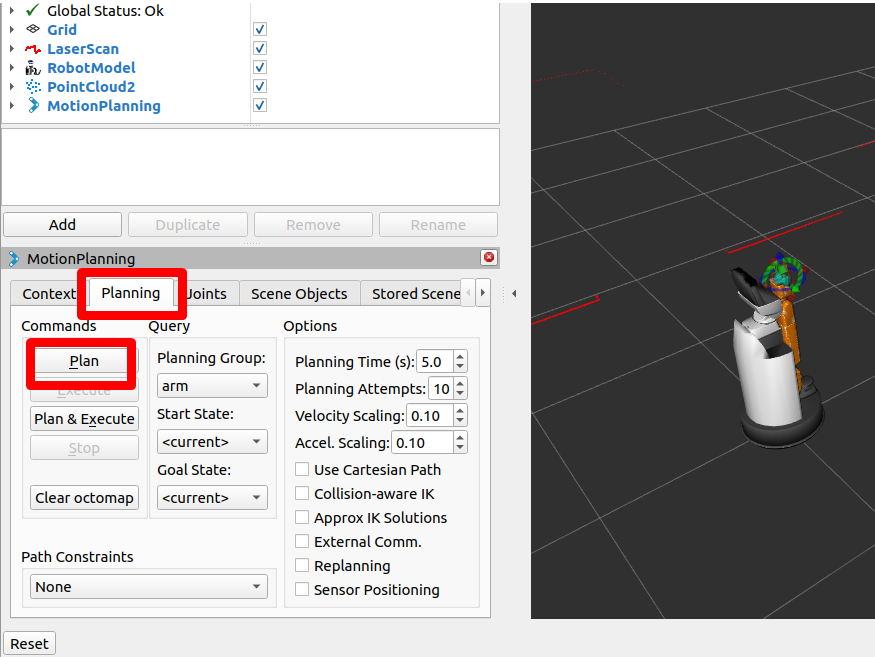
Click “Plan” in the “Planning” tab. In RViz, you can observe the planned motion toward the target pose, but the robot will not move yet.
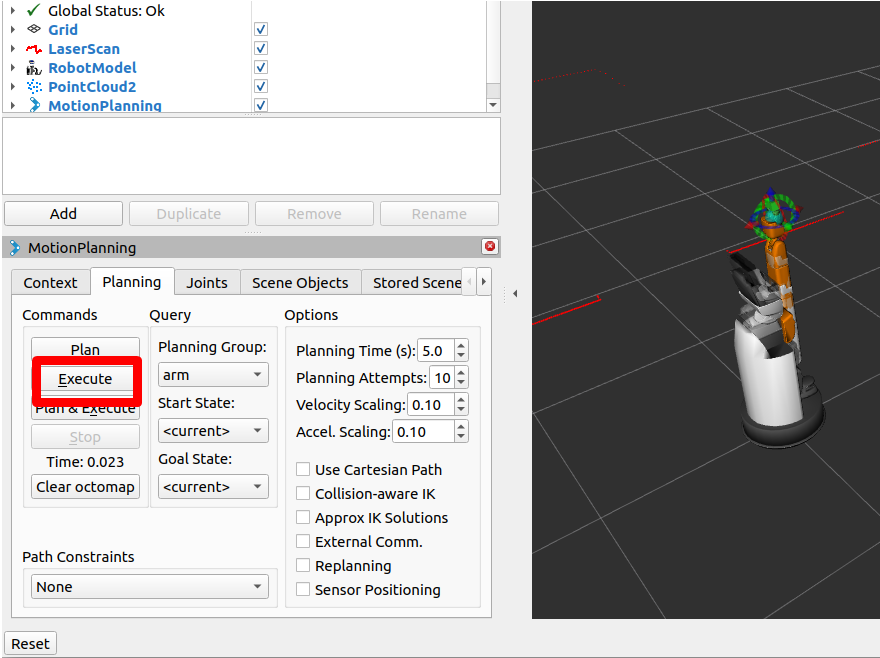
Click “Execute” in the “Planning” tab. You can now observe that the robot actually moves to the target pose.
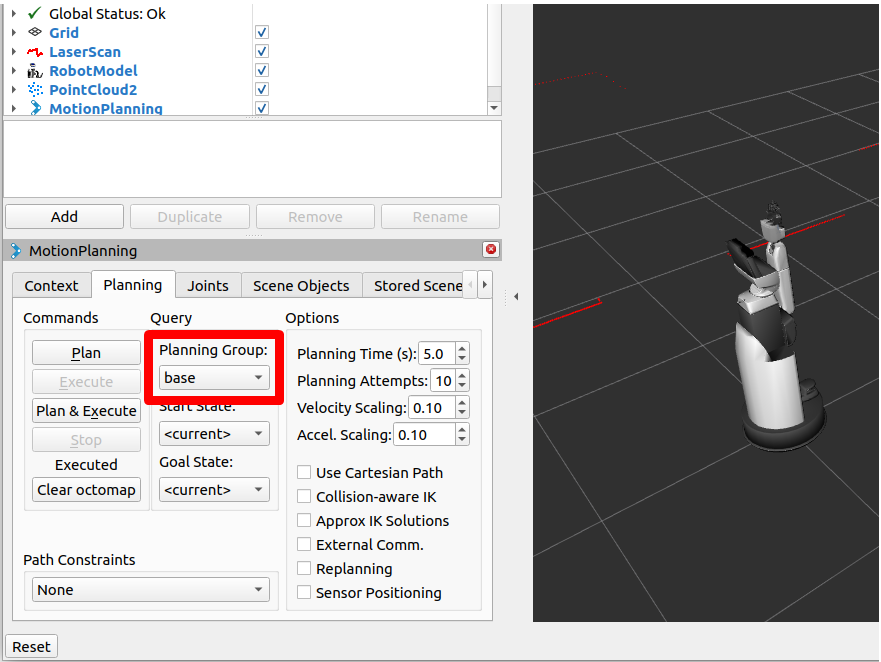
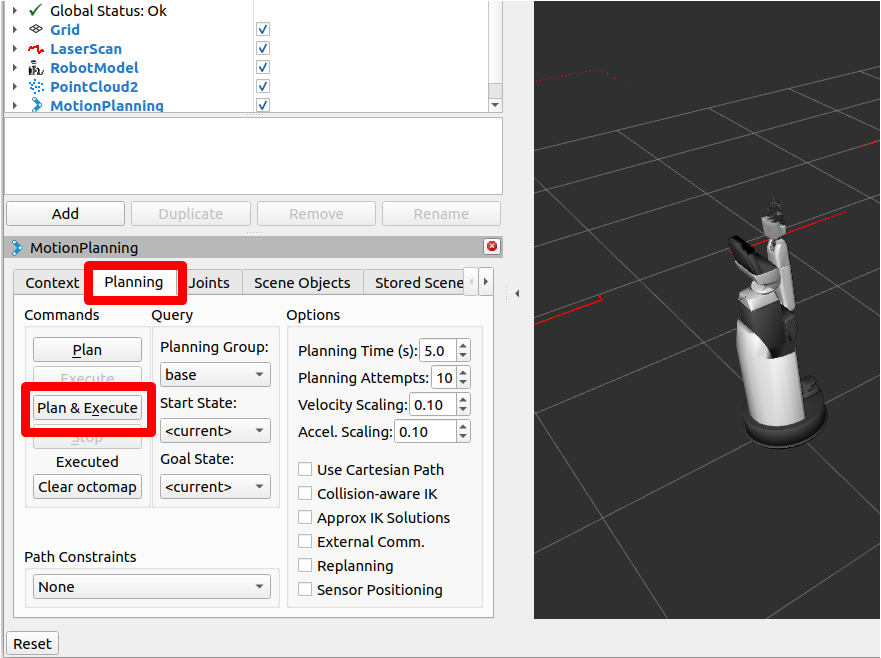
Change the “Planning Group” in the “Planning” tab from “arm” to “base”.
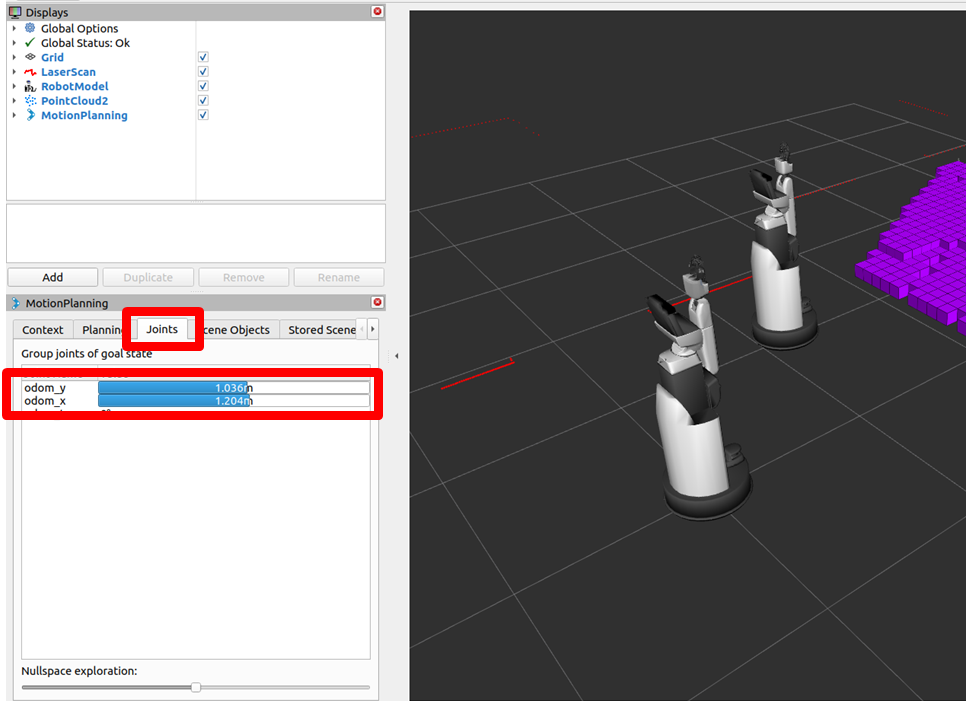
In the “Joints” tab, move the “odom_y” and “odom_x” sliders to the right to increase the values.
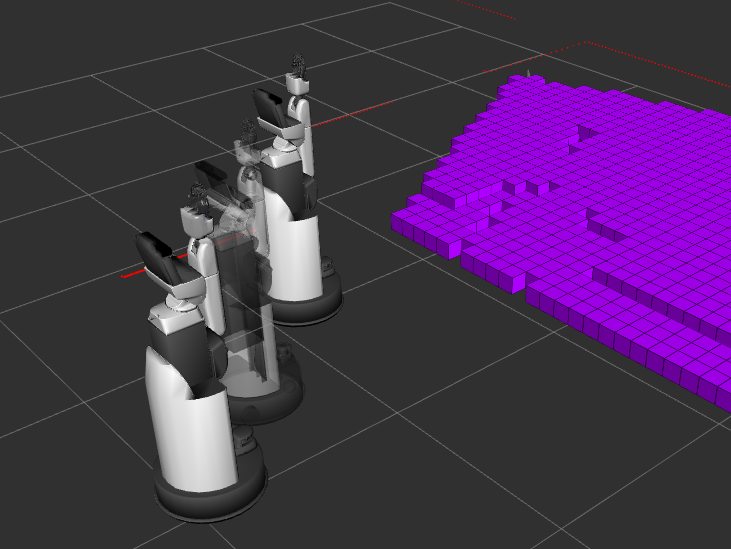
This time, click “Plan & Execute” in the “Planning” tab. You can observe both the planned motion and the actual motion to the target pose simultaneously.
4.1.4. Example Programs#
This section explains how to run the example programs.
Launch MoveIt2 by referring to Launching MoveIt2 .
The procedure for running an example program is as follows.
Refer to “On the Simulator” in Launching MoveIt2 and set the environment variables.
Run the following to run an example program.
Replace
<Example PROGRAM>with the program name described below.$ cd ~/hsr_ros2_ws/ $ source install/setup.bash $ ros2 launch hsrb_moveit_config hsrb_example.launch.py use_sim_time:=true example_name:=<Example PROGRAM>
The sample programs provided are as follows.
Program Name
Description
moveit_fk_demo
An example program that operates HSR by sending command values to each joint axis.
moveit_ik_demo
An example program that operates HSR by specifying the end-effector position as the target value. In addition to the default method, you can also test two other methods: one that moves the base as much as possible and another that minimizes base movement.
moveit_gripper_demo
An example program that demonstrates hand opening/closing using position control and interruption behavior using torque control.
moveit_constraints_demo
An example program that sets constraints on the end-effector’s pose . You can compare the behavior with and without constraints applied.